Applications Instructions
Step 1: Initial Cleaning & Inspection
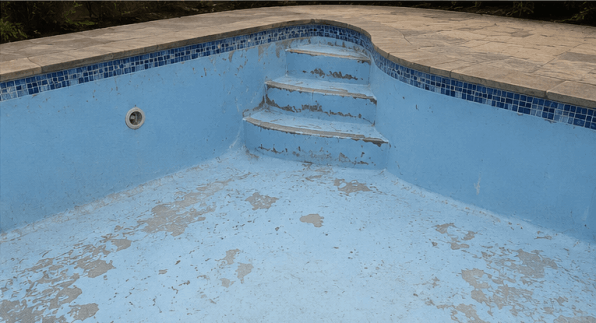
When over coating previously Paint coated surfaces, all previous paints should be removed from the surface using a P60 grit sandpaper.
Step 2: Repairing Cracks & Holes
Identify all cracks, holes, or surface defects.
Please note that primer and Pool Paint are not designed to fill cracks, level uneven surfaces, or hide substrate imperfections. Fill all cracks and holes using Polycell Rockset. Always follow the manufacture’s instructions for the repair product used.
Once the filler has fully cured, sand the repaired areas smoothing using a 60-80 grit sandpaper to achieve a flat, even surface.
Step 3: Application - Pool Armour Epoxy Primer
Pool Armour Epoxy Primer is a two-component system consisting of:
Part A - Primer (Product)
Part B - Hardener
Always mix the primer strictly according to the ratio indicated on the product label.
Do not cross-mix primer and pool Paint hardener's, as they are not interchangeable products.
Purpose of the Pool Primer
Pool Primers are preparatory coatings designed to penetrate to the concrete substrate, improving adhesion and ensuring optimal bonding of the Pool Paint.
Mixing Instructions
1.Add Primer Part B (Hardener) to Primer Part A (Product).
2.Mix thoroughly using a flat paddle or electric mixer.
3.Avoid excessive agitation to prevent air entrapment and foaming.
4.Stir occasionally during applications to prevent component separation.
5.Allow the mixed primer to stand for 5-10 minutes before application.
Ideal application temperature is 21°C
Pot Life: Use within 2 hours of mixing.
Application Method
Begin by cutting in and trimming along wall edges using a 50 mm - 75 mm paintbrush.
Apply the primer using a 225 mm Mohair Roller (Prepare roller by pulling out excessive hair with mask tape) Ensuring a thick, even coat over all exposed concrete or plaster areas.
Cleanup & Drying
Clean tools immediately with thinners.
It is recommended to use a new roller for each coating layer (often more cost-effective than cleaning)
Allow the primer to dry for approximately 12 to 24 hours.
Drying times may vary depending on temperature and humidity.
Pool Armour Epoxy Coating Coating Application:
Step 4: Applying Pool Armour Epoxy Coating
Pool Armour Epoxy Coating is also a two-component system:
Part A - Pool Paint (Product)
Part B - Hardener
Mixing Instructions
Add Pool Paint Part B (hardener) to Pool Paint Part A (product).
2.Mix thoroughly using a flat paddle or electric mixer.
3.Avoid over mixing to prevent air entrapment and foaming.
4.Stir occasionally during application to maintain uniform consistency.
5.allow the mixed Paint to stand for 5 to 10 minutes before application.
Ideal application temperature is 21°C
Pot life: Use within 2 hours of mixing.
Application Method
Apply the Pool Paint across the pool surface.
It is strongly recommended to apply two thinner coats rather than one thick coat to:
- Prevent runs and sagging on vertical surfaces
- Ensure consistent coverage and curing
- Improve long-term performance.
Drying & Curing Times
Allow a minimum of 24 hours between Pool coats. Cooler temperatures and high humidity may extend drying and curing times.
The Pool Paint requires a full curing period of 7 days after the final coat. Do not fill the pool with water until the full curing time has elapsed, as premature filling may compromise coating performance and durability.
Important Disclaimer
Remember, the Pool coating is only as strong as the surface to which it bonds. Failure to carry out the correct surface preparation will result in coating failure. Therefore, Pool Armour Epoxy Coating cannot be held liable for defects or failures arising from inadequate or incorrect surface preparation, which will be deemed a preparation failure.
Water Testing & Balance
Always have new pool water professionally tested for pH, Total Alkalinity, and especially Calcium (Total) Hardness at a swimming pool water testing facility. (most pool shops off free water testing.)
Excessive chalking may occur as a result of low calcium hardness, low alkalinity, or low pH.
Regularly monitor water chemistry using water test strips or by testing at your nearest pool shop. (Note: HTH test strips do not test for Total Hardness.)
During Curing & Initial Drying
Avoid garden work such as cutting grass, raking leaves, or creating dust near the pool while the coating is still wet.
Do not use sprinklers near the pool during the first 3 days after application.
Do not cover the pool with a solid, non-breathable covers while drying, as the coating requires ventilation.
Keep pets and children away from the pool area until the coating is fully cured.
Filling the Pool
Water may only be added after a minimum of 7 days, allowing the Paint coating to fully cure.
Fill the pool in one continuous inflow until full.
Do not allow water to run down the pools walls during filling, as continuous water flow and friction may cause slight discoloration at this stage.
Do not leave the pool partially filled for extended periods, as this may cause ring discoloration.
Chemical Handling & ongoing Maintenance
Begin water balancing by correcting Total Alkalinity first. Low alkalinity may result in yellowish or brown discoloration of pool surfaces.
Although Pool Armour Epoxy Coating has excellent chemical resistance and a proven performance history, it is recommended that all pool chemicals be added through the weir basket while the pump is running.
Always follow chemical manufacturers' recommendations. No warranties are provided against staining.
Floating chlorine dispensers (string drifters) should be kept at least 1 meter away from pool walls prevent temporary yellow streaking.
For salt chlorinator systems, distribute the salt evenly and within prescribed limits while the filter pump is running for several hours.
Minimize salt dosage where possible to extend the lifespan of the Paint coating
Warranty & Liability Disclaimer
Any peeling, blistering or coating failure caused by weak, porous, or unstable cement, marbelite, fiberglass, or plaster substrates - including material coming loose from behind the Paint layer will not be covered by warranty.
Recommended Water Chemistry Levels
Calcium Total Hardness: 400 - 550 ppm
pH: 7.2 - 7.6
Total Alkalinity: 100 – 150ppm
Free Chlorine: 1.0–3.0 ppm
Legal Disclaimer
Pool Armour Epoxy Coating, It’s owners, affiliates, agents or employees shall not
be held liable for any claims whatsoever relating to water loss, injuries, health conditions, or loss of life, under any circumstances, during installation, thereafter, or during the use of the swimming pool.
Preparing a New Concrete Pool
New concrete pools must be allowed to cure for a minimum of 28 days before any Paint coating is applied. Cold weather and high humidity may extend curing times and should be taken into consideration.
Step 1: Initial Cleaning & Inspection
Sweep the entire pool thoroughly to remove loose dust and debris. This will allow for a detailed inspection of the surface so that any problem areas can be identified and addressed.
Step 2: Repairing Cracks & Holes
Identify all cracks, holes, or surface defects.
Please note that primer and Pool Paint are not designed to fill cracks, level uneven surfaces, or hide substrate imperfections. Fill all cracks and holes using Polycell Rockset. Always follow the manufacture’s instructions for the repair product used.
Once the filler has fully cured, sand the repaired areas smoothing using a 60-80 grit sandpaper to achieve a flat, even surface.
Step 3: Application - Pool Armour Epoxy Primer
Pool Armour Epoxy Primer is a two-component system consisting of:
Part A - Primer (Product)
Part B - Hardener
Always mix the primer strictly according to the ratio indicated on the product label.
Do not cross-mix primer and pool Paint hardener's, as they are not interchangeable products.
Purpose of the Pool Primer
Pool Primers are preparatory coatings designed to penetrate to the concrete substrate, improving adhesion and ensuring optimal bonding of the Pool Paint.
Mixing Instructions
1.Add Primer Part B (Hardener) to Primer Part A (Product).
2.Mix thoroughly using a flat paddle or electric mixer.
3.Avoid excessive agitation to prevent air entrapment and foaming.
4.Stir occasionally during applications to prevent component separation.
5.Allow the mixed primer to stand for 5-10 minutes before application.
Ideal application temperature is 21°C
Pot Life: Use within 2 hours of mixing.
Application Method
Begin by cutting in and trimming along wall edges using a 50 mm - 75 mm paintbrush.
Apply the primer using a 225 mm Mohair Roller (Prepare roller by pulling out excessive hair with mask tape) Ensuring a thick, even coat over all exposed concrete or plaster areas.
Cleanup & Drying
Clean tools immediately with thinners.
It is recommended to use a new roller for each coating layer (often more cost-effective than cleaning)
Allow the primer to dry for approximately 12 to 24 hours.
Drying times may vary depending on temperature and humidity.
Pool Armour Epoxy Coating Coating Application:
Step 4: Applying Pool Armour Epoxy Coating
Pool Armour Epoxy Coating is also a two-component system:
Part A - Pool Paint (Product)
Part B - Hardener
Mixing Instructions
Add Pool Paint Part B (hardener) to Pool Paint Part A (product).
2.Mix thoroughly using a flat paddle or electric mixer.
3.Avoid over mixing to prevent air entrapment and foaming.
4.Stir occasionally during application to maintain uniform consistency.
5.allow the mixed Paint to stand for 5 to 10 minutes before application.
Ideal application temperature is 21°C
Pot life: Use within 2 hours of mixing.
Application Method
Apply the Pool Paint across the pool surface.
It is strongly recommended to apply two thinner coats rather than one thick coat to:
- Prevent runs and sagging on vertical surfaces
- Ensure consistent coverage and curing
- Improve long-term performance.
Drying & Curing Times
Allow a minimum of 24 hours between Pool coats. Cooler temperatures and high humidity may extend drying and curing times.
The Pool Paint requires a full curing period of 7 days after the final coat. Do not fill the pool with water until the full curing time has elapsed, as premature filling may compromise coating performance and durability.
Important Disclaimer
Remember, the Pool coating is only as strong as the surface to which it bonds. Failure to carry out the correct surface preparation will result in coating failure. Therefore, Pool Armour Epoxy Coating cannot be held liable for defects or failures arising from inadequate or incorrect surface preparation, which will be deemed a preparation failure.
Water Testing & Balance
Always have new pool water professionally tested for pH, Total Alkalinity, and especially Calcium (Total) Hardness at a swimming pool water testing facility. (most pool shops off free water testing.)
Excessive chalking may occur as a result of low calcium hardness, low alkalinity, or low pH.
Regularly monitor water chemistry using water test strips or by testing at your nearest pool shop. (Note: HTH test strips do not test for Total Hardness.)
During Curing & Initial Drying
Avoid garden work such as cutting grass, raking leaves, or creating dust near the pool while the coating is still wet.
Do not use sprinklers near the pool during the first 3 days after application.
Do not cover the pool with a solid, non-breathable covers while drying, as the coating requires ventilation.
Keep pets and children away from the pool area until the coating is fully cured.
Filling the Pool
Water may only be added after a minimum of 7 days, allowing the Paint coating to fully cure.
Fill the pool in one continuous inflow until full.
Do not allow water to run down the pools walls during filling, as continuous water flow and friction may cause slight discoloration at this stage.
Do not leave the pool partially filled for extended periods, as this may cause ring discoloration.
Chemical Handling & ongoing Maintenance
Begin water balancing by correcting Total Alkalinity first. Low alkalinity may result in yellowish or brown discoloration of pool surfaces.
Although Pool Armour Epoxy Coating has excellent chemical resistance and a proven performance history, it is recommended that all pool chemicals be added through the weir basket while the pump is running.
Always follow chemical manufacturers' recommendations. No warranties are provided against staining.
Floating chlorine dispensers (string drifters) should be kept at least 1 meter away from pool walls prevent temporary yellow streaking.
For salt chlorinator systems, distribute the salt evenly and within prescribed limits while the filter pump is running for several hours.
Minimize salt dosage where possible to extend the lifespan of the Paint coating
Warranty & Liability Disclaimer
Any peeling, blistering or coating failure caused by weak, porous, or unstable cement, marbelite, fiberglass, or plaster substrates - including material coming loose from behind the Paint layer will not be covered by warranty.
Recommended Water Chemistry Levels
Calcium Total Hardness: 400 - 550 ppm
pH: 7.2 - 7.6
Total Alkalinity: 100 – 150ppm
Free Chlorine: 1.0–3.0 ppm
Legal Disclaimer
Pool Armour Epoxy Coating, It’s owners, affiliates, agents or employees shall not
be held liable for any claims whatsoever relating to water loss, injuries, health conditions, or loss of life, under any circumstances, during installation, thereafter, or during the use of the swimming pool.
Step 1: Initial Cleaning & Inspection
Inspect the fiberglass pool thoroughly. Any cracks, blisters, bubbles (large or small), or areas at risk of cracking must be repaired using a suitable fiberglass repair kit, following the repair product manufacturer’s instructions.
Once repairs are complete and fully cured, sand the entire pool using P60 grit sandpaper to ensure proper surface profiling and adhesion.
After sanding, remove all dust and contaminants, ensuring the surface is clean, dry, and free of residues.
Applying Pool Armour Epoxy Coating
Pool Armour Epoxy Coating is also a two-component system:
Part A - Pool Paint (Product)
Part B - Hardener
Mixing Instructions
Add Pool Paint Part B (hardener) to Pool Paint Part A (product).
2.Mix thoroughly using a flat paddle or electric mixer.
3.Avoid over mixing to prevent air entrapment and foaming.
4.Stir occasionally during application to maintain uniform consistency.
5.allow the mixed Paint to stand for 5 to 10 minutes before application.
Ideal application temperature is 21°C
Pot life: Use within 2 hours of mixing.
Step 2: Application Method
Apply the Pool Paint across the pool surface.
It is strongly recommended to apply two thinner coats rather than one thick coat to:
- Prevent runs and sagging on vertical surfaces
- Ensure consistent coverage and curing
- Improve long-term performance.
Drying & Curing Times
Allow a minimum of 24 hours between Pool coats. Cooler temperatures and high humidity may extend drying and curing times.
The Pool Paint requires a full curing period of 7 days after the final coat. Do not fill the pool with water until the full curing time has elapsed, as premature filling may compromise coating performance and durability.
(Note: Pool Primer is not required for fiberglass pools.)
Important Disclaimer
Remember, the Pool coating is only as strong as the surface to which it bonds. Failure to carry out the correct surface preparation will result in coating failure. Therefore, Pool Armour Epoxy Coating cannot be held liable for defects or failures arising from inadequate or incorrect surface preparation, which will be deemed a preparation failure.
Water Testing & Balance
Always have new pool water professionally tested for pH, Total Alkalinity, and especially Calcium (Total) Hardness at a swimming pool water testing facility. (most pool shops off free water testing.)
Excessive chalking may occur as a result of low calcium hardness, low alkalinity, or low pH.
Regularly monitor water chemistry using water test strips or by testing at your nearest pool shop. (Note: HTH test strips do not test for Total Hardness.)
During Curing & Initial Drying
Avoid garden work such as cutting grass, raking leaves, or creating dust near the pool while the coating is still wet.
Do not use sprinklers near the pool during the first 3 days after application.
Do not cover the pool with a solid, non-breathable covers while drying, as the coating requires ventilation.
Keep pets and children away from the pool area until the coating is fully cured.
Filling the Pool
Water may only be added after a minimum of 7 days, allowing the Paint coating to fully cure.
Fill the pool in one continuous inflow until full.
Do not allow water to run down the pools walls during filling, as continuous water flow and friction may cause slight discoloration at this stage.
Do not leave the pool partially filled for extended periods, as this may cause ring discoloration.
Chemical Handling & ongoing Maintenance
Begin water balancing by correcting Total Alkalinity first. Low alkalinity may result in yellowish or brown discoloration of pool surfaces.
Although Pool Armour Epoxy Coating has excellent chemical resistance and a proven performance history, it is recommended that all pool chemicals be added through the weir basket while the pump is running.
Always follow chemical manufacturers' recommendations. No warranties are provided against staining.
Floating chlorine dispensers (string drifters) should be kept at least 1 meter away from pool walls prevent temporary yellow streaking.
For salt chlorinator systems, distribute the salt evenly and within prescribed limits while the filter pump is running for several hours.
Minimize salt dosage where possible to extend the lifespan of the Paint coating
Warranty & Liability Disclaimer
Any peeling, blistering or coating failure caused by weak, porous, or unstable cement, marbelite, fiberglass, or plaster substrates - including material coming loose from behind the Paint layer will not be covered by warranty.
Recommended Water Chemistry Levels
Calcium Total Hardness: 400 - 550 ppm
pH: 7.2 - 7.6
Total Alkalinity: 100 – 150ppm
Free Chlorine: 1.0–3.0 ppm
Legal Disclaimer
Pool Armour Epoxy Coating, It’s owners, affiliates, agents or employees shall not
be held liable for any claims whatsoever relating to water loss, injuries, health conditions, or loss of life, under any circumstances, during installation, thereafter, or during the use of the swimming pool
Step 1: Initial Cleaning & Inspection
Thoroughly inspect the marbelite surface to ensure it is in good, stable condition, with no signs of movement, cracking, decontamination, or brittleness.
Any loose, hollow, or compromised areas must be removed and repaired before proceeding.
Sand the entire pool surface using P60 grit sandpaper to achieve proper surface profiling and promote optimal adhesion.
Once sanding is complete, remove all dust and contaminants, ensuring the surface is clean and dry.
Step 2: Repairing Cracks & Holes
Identify all cracks, holes, or surface defects.
Please note that primer and Pool Paint are not designed to fill cracks, level uneven surfaces, or hide substrate imperfections. Fill all cracks and holes using Polycell Rockset. Always follow the manufacture’s instructions for the repair product used.
Once the filler has fully cured, sand the repaired areas smoothing using a 60-80 grit sandpaper to achieve a flat, even surface.
Step 3: Application - Pool Armour Epoxy Primer
Pool Armour Epoxy Primer is a two-component system consisting of:
Part A - Primer (Product)
Part B - Hardener
Always mix the primer strictly according to the ratio indicated on the product label.
Do not cross-mix primer and pool Paint hardener's, as they are not interchangeable products.
Purpose of the Pool Primer
Pool Primers are preparatory coatings designed to penetrate to the concrete substrate, improving adhesion and ensuring optimal bonding of the Pool Paint.
Mixing Instructions
1.Add Primer Part B (Hardener) to Primer Part A (Product).
2.Mix thoroughly using a flat paddle or electric mixer.
3.Avoid excessive agitation to prevent air entrapment and foaming.
4.Stir occasionally during applications to prevent component separation.
5.Allow the mixed primer to stand for 5-10 minutes before application.
Ideal application temperature is 21°C
Pot Life: Use within 2 hours of mixing.
Application Method
Begin by cutting in and trimming along wall edges using a 50 mm - 75 mm paintbrush.
Apply the primer using a 225 mm Mohair Roller (Prepare roller by pulling out excessive hair with mask tape) Ensuring a thick, even coat over all exposed concrete or plaster areas.
Cleanup & Drying
Clean tools immediately with thinners.
It is recommended to use a new roller for each coating layer (often more cost-effective than cleaning)
Allow the primer to dry for approximately 12 to 24 hours.
Drying times may vary depending on temperature and humidity.
Pool Armour Epoxy Coating Coating Application:
Step 4: Applying Pool Armour Epoxy Coating
Pool Armour Epoxy Coating is also a two-component system:
Part A - Pool Paint (Product)
Part B - Hardener
Mixing Instructions
Add Pool Paint Part B (hardener) to Pool Paint Part A (product).
2.Mix thoroughly using a flat paddle or electric mixer.
3.Avoid over mixing to prevent air entrapment and foaming.
4.Stir occasionally during application to maintain uniform consistency.
5.allow the mixed Paint to stand for 5 to 10 minutes before application.
Ideal application temperature is 21°C
Pot life: Use within 2 hours of mixing.
Application Method
Apply the Pool Paint across the pool surface.
It is strongly recommended to apply two thinner coats rather than one thick coat to:
- Prevent runs and sagging on vertical surfaces
- Ensure consistent coverage and curing
- Improve long-term performance.
Drying & Curing Times
Allow a minimum of 24 hours between Pool coats. Cooler temperatures and high humidity may extend drying and curing times.
The Pool Paint requires a full curing period of 7 days after the final coat. Do not fill the pool with water until the full curing time has elapsed, as premature filling may compromise coating performance and durability.
Important Disclaimer
Remember, the Pool coating is only as strong as the surface to which it bonds. Failure to carry out the correct surface preparation will result in coating failure. Therefore, Pool Armour Epoxy Coating cannot be held liable for defects or failures arising from inadequate or incorrect surface preparation, which will be deemed a preparation failure.
Water Testing & Balance
Always have new pool water professionally tested for pH, Total Alkalinity, and especially Calcium (Total) Hardness at a swimming pool water testing facility. (most pool shops off free water testing.)
Excessive chalking may occur as a result of low calcium hardness, low alkalinity, or low pH.
Regularly monitor water chemistry using water test strips or by testing at your nearest pool shop. (Note: HTH test strips do not test for Total Hardness.)
During Curing & Initial Drying
Avoid garden work such as cutting grass, raking leaves, or creating dust near the pool while the coating is still wet.
Do not use sprinklers near the pool during the first 3 days after application.
Do not cover the pool with a solid, non-breathable covers while drying, as the coating requires ventilation.
Keep pets and children away from the pool area until the coating is fully cured.
Filling the Pool
Water may only be added after a minimum of 7 days, allowing the Paint coating to fully cure.
Fill the pool in one continuous inflow until full.
Do not allow water to run down the pools walls during filling, as continuous water flow and friction may cause slight discoloration at this stage.
Do not leave the pool partially filled for extended periods, as this may cause ring discoloration.
Chemical Handling & ongoing Maintenance
Begin water balancing by correcting Total Alkalinity first. Low alkalinity may result in yellowish or brown discoloration of pool surfaces.
Although Pool Armour Epoxy Coating has excellent chemical resistance and a proven performance history, it is recommended that all pool chemicals be added through the weir basket while the pump is running.
Always follow chemical manufacturers' recommendations. No warranties are provided against staining.
Floating chlorine dispensers (string drifters) should be kept at least 1 meter away from pool walls prevent temporary yellow streaking.
For salt chlorinator systems, distribute the salt evenly and within prescribed limits while the filter pump is running for several hours.
Minimize salt dosage where possible to extend the lifespan of the Paint coating
Warranty & Liability Disclaimer
Any peeling, blistering or coating failure caused by weak, porous, or unstable cement, marbelite, fiberglass, or plaster substrates - including material coming loose from behind the Paint layer will not be covered by warranty.
Recommended Water Chemistry Levels
Calcium Total Hardness: 400 - 550 ppm
pH: 7.2 - 7.6
Total Alkalinity: 100 – 150ppm
Free Chlorine: 1.0–3.0 ppm
Legal Disclaimer
Pool Armour Epoxy Coating, It’s owners, affiliates, agents or employees shall not
be held liable for any claims whatsoever relating to water loss, injuries, health conditions, or loss of life, under any circumstances, during installation, thereafter, or during the use of the swimming pool.
